In the dynamic landscape of online marketing, tracking user behavior on your website is paramount for understanding audience engagement and optimizing your digital strategy. One powerful tool for this purpose is the Facebook Pixel, a snippet of code that allows you to track conversions, optimize ads, and build targeted audiences for your Facebook advertising campaigns. While implementing the Facebook Pixel directly onto your website is feasible, leveraging the capabilities of Google Tag Manager (GTM) provides a more efficient and streamlined approach. In this guide, we’ll walk you through the process of implementing the Facebook Pixel tag using Google Tag Manager, empowering you to harness the full potential of your website tracking efforts.
Understanding the Basics
Before diving into the implementation process, let’s grasp the fundamental concepts of both Facebook Pixel and Google Tag Manager.
Facebook Pixel: The Facebook Pixel is a piece of JavaScript code provided by Facebook that you add to your website to track various events, such as page views, purchases, form submissions, and more. It enables you to measure the effectiveness of your Facebook ads, optimize ad delivery, and create custom audiences for retargeting.
Google Tag Manager (GTM): GTM is a free tool provided by Google that simplifies the process of managing website tags. With GTM, you can deploy and update tags on your website without requiring manual code changes, offering greater flexibility and control over your tracking implementation.
Steps to Implement Facebook Pixel via GTM
Follow these steps to seamlessly integrate the Facebook Pixel into your website using Google Tag Manager:
- Access Google Tag Manager: Log in to your GTM account and navigate to the container associated with your website.
- Create a New Tag: Within GTM, click on “Tags” and then “New Tag” to initiate the tag creation process.
- Choose Tag Configuration: Select “Tag Configuration” and opt for “Custom HTML” as the tag type. This allows you to insert the Facebook Pixel code snippet.
- Add Facebook Pixel Code: Paste your Facebook Pixel base code into the HTML field. You can obtain this code from your Facebook Ads Manager account under the “Pixels” section or you can use the below provided code only thing you need to change is init id from the below code.
- Add Base code first: This base tag serves as the cornerstone for tracking various user interactions and events across your site. The code snippet provided contains the necessary initialization code for the Facebook Pixel, allowing it to begin collecting valuable data about visitor behavior. While some instances may feature a single Pixel ID, others might encompass multiple IDs for different purposes. Regardless, it’s essential to ensure that the initialization code is correctly configured to kickstart the tracking process effectively.
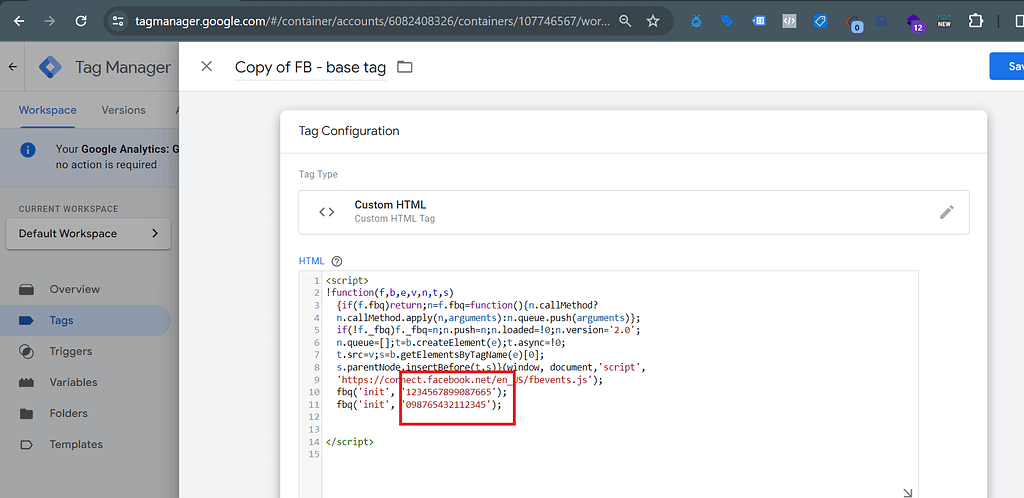
<script>
!function(f,b,e,v,n,t,s)
  {if(f.fbq)return;n=f.fbq=function(){n.callMethod?
  n.callMethod.apply(n,arguments):n.queue.push(arguments)};
  if(!f._fbq)f._fbq=n;n.push=n;n.loaded=!0;n.version='2.0';
  n.queue=[];t=b.createElement(e);t.async=!0;
  t.src=v;s=b.getElementsByTagName(e)[0];
  s.parentNode.insertBefore(t,s)}(window, document,'script',
  'https://connect.facebook.net/en_US/fbevents.js');
  fbq('init', '1234567890'); #change this init (pixel id) with yours
</script>
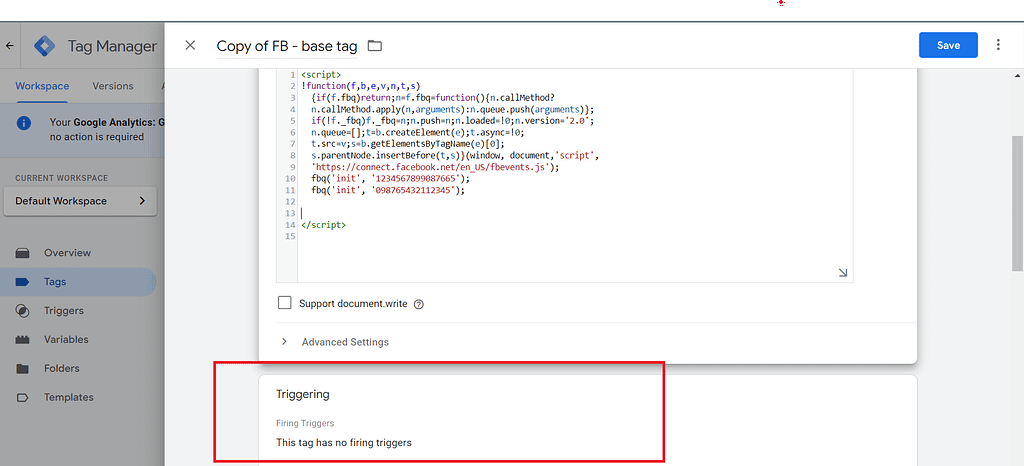
Configure Triggers: The Base Tag should not container any triggers set
Page View Tag: When implementing the Facebook Pixel for tracking page views through Google Tag Manager, the Page View tag plays a pivotal role in capturing crucial data about user engagement on your website. By configuring this tag, you enable the Facebook Pixel to fire whenever a user navigates to a new page, providing valuable insights into their browsing behavior and preferences. This foundational step in the tracking process lays the groundwork for more advanced tracking of specific events and conversions, empowering you to refine your digital marketing strategies and optimize ad campaigns effectively.
- Create a Pageview Tag: Copy the below code and change the init(pixel id). The below images contains two Pixel ID’s. While some instances may feature a single Pixel ID, others might encompass multiple IDs for different purposes.
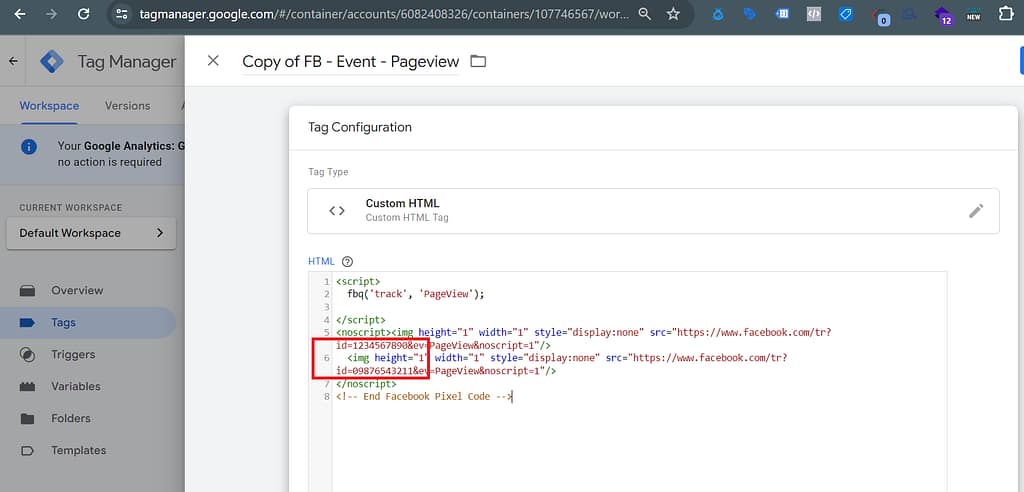
<script>
  fbq('track', 'PageView');
</script>

<noscript><img height="1" width="1" style="display:none" src="https://www.facebook.com/tr?id=1234567890&ev=PageView&noscript=1"/>
  <img height="1" width="1" style="display:none" src="https://www.facebook.com/tr?id=09876543211&ev=PageView&noscript=1"/>
</noscript>
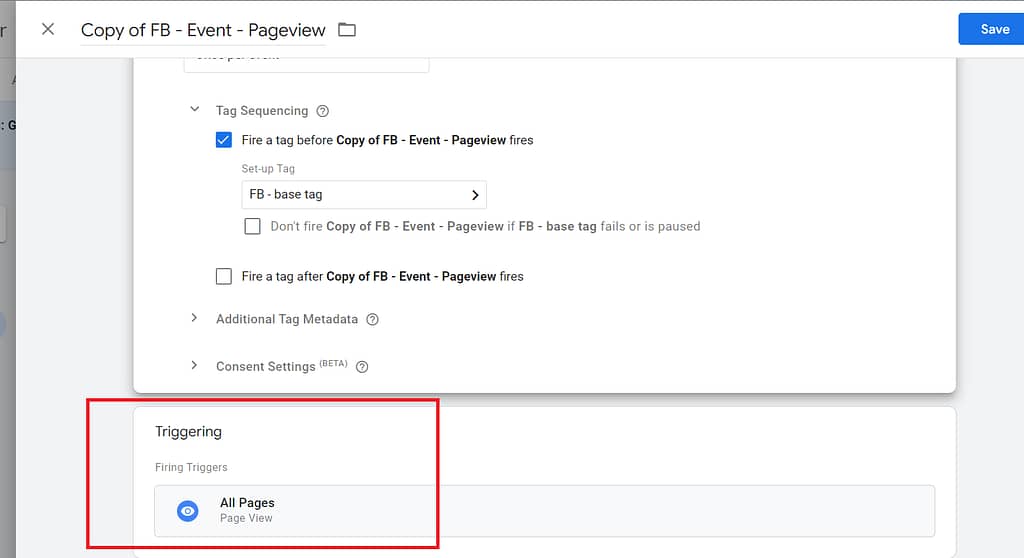
Tag Sequencing and Triggers: To set up the Pageview Tag for Facebook Pixel using Google Tag Manager, we need to make sure it fires on every page of our website. Before that, we have to make sure the base tag for Facebook Pixel fires first. In the Tag Sequencing, we’ll arrange it so that the Base Tag fires before the Pageview Tag. This ensures that our tracking works smoothly and accurately across all pages of our website.
Final Step: Implement the Lead Conversion Tracking Tag, which allows you to track leads effectively and gather valuable data in Facebook
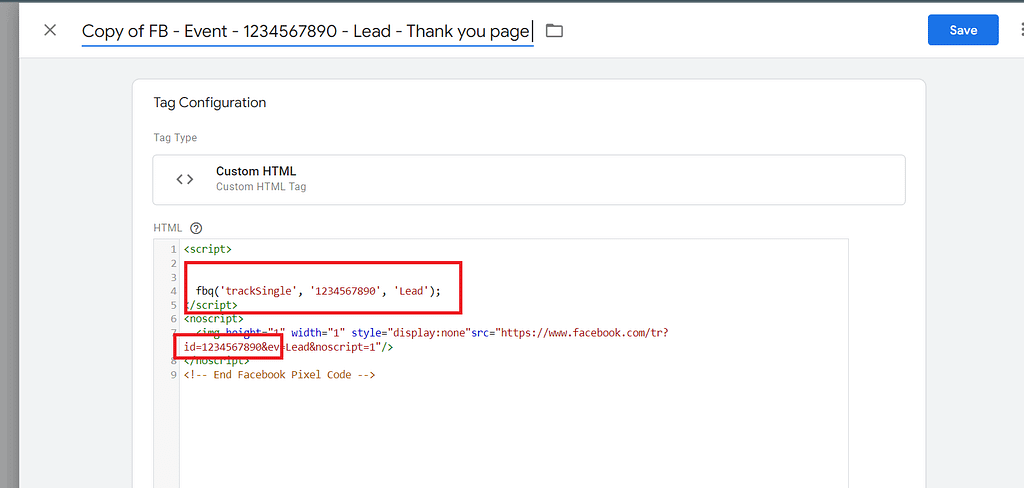
Trigger for this Tag would be the Thankyou page after the form submission

You can use the following code for lead conversion tracking, but make sure to replace the initialization ID and adjust the naming conventions as needed. Facebook recommends specific naming conventions for events, so it’s advisable to refer to their guidelines for optimal setup.
<script>
  fbq('trackSingle', '1234567890', 'Lead');
</script>

<noscript>
  <img height="1" width="1" style="display:none"src="https://www.facebook.com/tr?id=1234567890&ev=Lead&noscript=1"/>
</noscript>- Save the Tag: Provide a descriptive name for your tag, such as “Facebook Pixel – All Pages,” and click “Save” to preserve your configuration.
- Preview and Publish: Before making your changes live, use GTM’s preview mode to test the implementation on your website. Once verified, publish the container to apply the changes to your live site.
- Verification and Optimization: After publishing, ensure that the Facebook Pixel fires correctly using the Facebook Pixel Helper browser extension. Monitor the data collected by the Pixel in your Facebook Ads Manager dashboard and leverage it to optimize your ad campaigns effectively.
Conclusion
By integrating the Facebook Pixel through Google Tag Manager, you gain a robust solution for tracking user interactions on your website and maximizing the impact of your Facebook advertising efforts. This streamlined approach not only simplifies the implementation process but also offers greater flexibility and scalability for future tracking needs. Empower your digital marketing strategy by mastering the art of website tracking with Facebook Pixel and Google Tag Manager.
Implementing the Facebook Pixel via Google Tag Manager is a strategic move towards enhancing your website tracking capabilities and maximizing the effectiveness of your Facebook advertising campaigns. By following the steps outlined in this guide, you can seamlessly integrate the Pixel into your website and leverage its powerful features to drive meaningful results for your business.

Leave a Reply